Setting up shop on Facebook and Instagram
Connect with your customers more easily and start selling your products online with the help of Facebook and Instagram Shops. This new feature is rolling out now and will become widely available to all businesses over the coming months. As it stands around a million businesses can already access this functionality and start selling their products on Facebook and Instagram with no fee. In this article, we’ll take a look at how you can set up your Facebook Shop to start selling your products online.
What you need to know about Facebook Shops
Shops are an easy way for businesses to create a custom digital shop that works on both Facebook and Instagram. At the moment you need to already have a Facebook Page Shop or Instagram Profile Shop setup in order to start taking advantage of the new functionality. Facebook Shops let you showcase your brand and products through the native mobile app giving your customers a full screen and immersive experience.
Once set up they provide a unified presence on Facebook and Instagram which can be updated in one place allowing for simple management. Collections help you to arrange groups of products together into relevant themes to help your customers quickly find the products they are looking for.
Eligible businesses will be sent an email or notification that they can now start using Facebook Shops and may need to create a Commerce Account in Commerce Manager to get started.
How to set up your shop
Setting up your shop is a three-stage process that needs to be done through Commerce Manager on a computer.The steps you’ll need to follow are:
1. Create a collection
Collections are groups of products that you have full control over. Each collection has a name, description, cover media and between 6 and 30 products. To create your first collection simply log into Commerce Manager and click Create Collection. You’ll now be able to add the products that you want to the collection from your catalogue as well as adding details about the collection. It is recommended that you use at least one product image from the collection with a 4:3 image ratio and size of 1080 x 810 pixels. Once you have created your first collection, you’ll be able to create another collection or move to the next step.
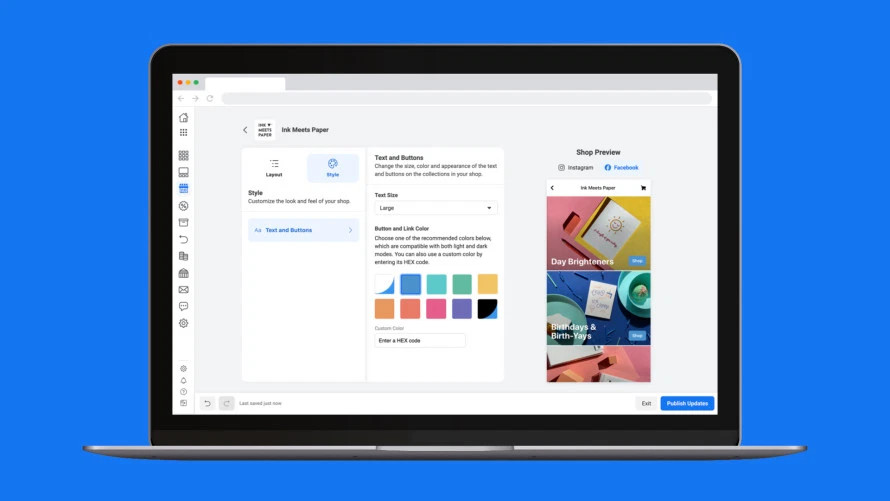
2. Customise your shop
Use the Shop Builder to customise the layout and style of your shop, this can be found under the Shops tab of your Commerce Manager. Use the Shop Preview to see how everything looks before saving your changes. Some of the changes that you can make include:
- Add, remove or arrange collections using the drag and drop editor.
- Choose featured collections for the top of your shop as well as for a carousel at the bottom of your shop.
- Change the size of text and the colours of your buttons and link colours.
3. Publish your shop
Once you’ve made all the necessary changes and are happy with how your shop looks you can publish it. Collections are approved one at a time so if you have recently created collections then when you publish your shop your collections will start to go live one at a time as they are approved. If you’d like to publish everything all at once simply wait until the status of your collections is showing as approved.
As well as making it easier for businesses to showcase and manage their products, customers will easily be able to contact businesses using Facebook Messenger, WhatsApp and Instagram Direct messages to helping to ensure all queries are answered as quickly as possible.
